Building my first custom keyboard
I’ve recently been going down the rabbit hole of mechanical keyboards. There are a number of great communities dedicated to the hobby of collecting, creating, and modifying them, going from tiny 40% size custom builds to gorgeous artisan keycaps. I’ve been using a Filco Majestouch-2 with MX Brown switches and a Cherry G80 with MX Blues for a while, but I was keen to try something a little different. Being impatient, I decided to jump right in at the deep end with designing a keyboard from scratch, sourcing all the components, and building it all by hand. This is a log of the process for those who are interested, and so that I don’t forget everything I did in case I want to build something else!
My first job was to design my layout, for which I had two main requirements: it had to be portable enough to carry around with me, but large enough to support the Dvorak key layout. It turns out that there’s a great site called the Keyboard Layout Editor which will allow you to fine-tune the placement and size of your keys and to label them with their function. After a number of iterations, I ended with this monstrosity.
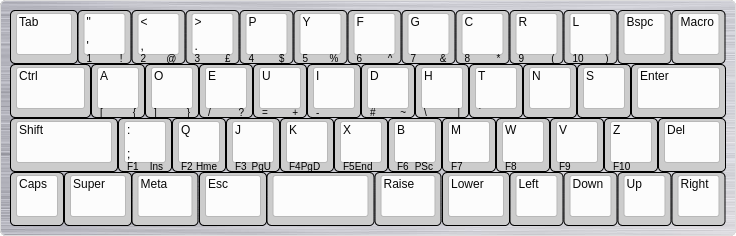
It is similar to an ANSI layout, but is missing the top two rows, has a column and a bit shaved off, and has an adorable little space bar, which is all I really need anyway. The two keys to the right of the space bar are “Raise” and “Lower” keys, which allow one to type numbers and symbols on the compact layout. Now that I’ve used the board for a bit, I’m pretty happy with the layout. The only problem is the the parentheses, which can be a bit of a pain to reach, which causes a bit of a problem seeing as I’m a software engineer. I’m considering remapping the delete key to a right shift and having taps of the left and right shift keys to be open and close parentheses. Apparently this used to be used on the Space Cadet keyboard which people go mad for, so I’ll give it a try and see if it helps.
Next was to get the plates designed. I have absolutely no experience with CAD software, but fortunately others have been in a similar predicament and have solved the problem for me. builder.swillkb.com will take the raw data produced by the Keyboard Layout Editor and spit out CAD designs at the other end, all ready to be sent to your preferred laser cutting shop. I ended up going for six 3mm holes for the case screws, which fit M3 machine screws perfectly, and a bit of rounding on the corners.

I got my plates custom cut at LaserMaster in Cornwall, England. They were very responsive, helpful, and reasonably priced, so I’d recommend them if you’re in the UK and looking for custom Aluminium plates. If you’d rather steel, you might want to check out LaserGist, who seem to be even cheaper if you’re just looking for a one-off.
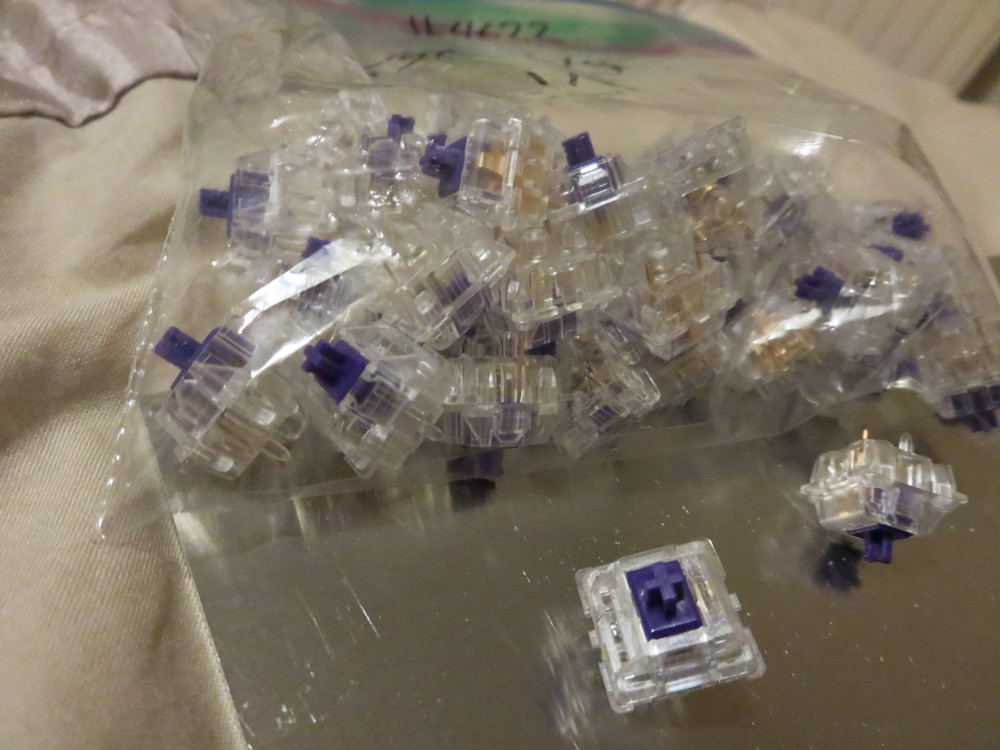
For switches, I chose 67g R4 Zealios, which you can get from ZealPC. Shipping was pretty expensive to the UK, but I think it was worth it, as these are really incredible switches. I was used to the light, scratchy feel of Cherry Browns, but these are much smoother, much more tactile, and I find myself bottoming out on them a lot less. Coupled with the light switch plate, I find myself far more comfortable typing on it for long periods of time, despite the heavier springs.
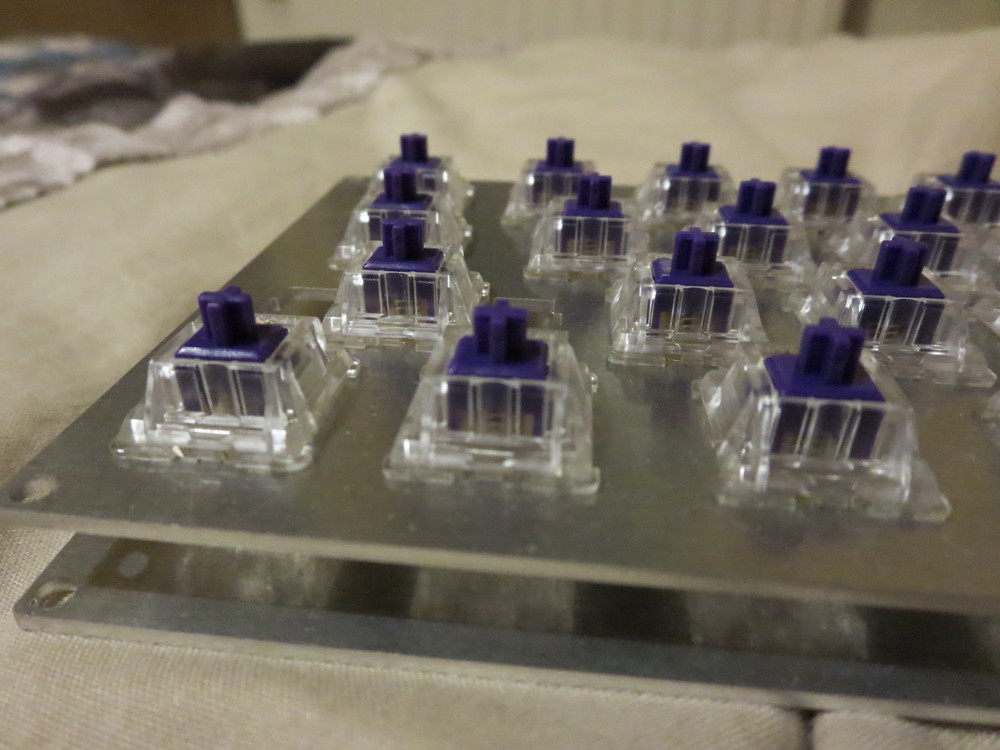
Here are the switches mounted snugly into the top plate. I was terrified that they wouldn’t fit, but they clicked in perfectly and could be removed easily enough with a screwdriver in case I needed to at a later date.
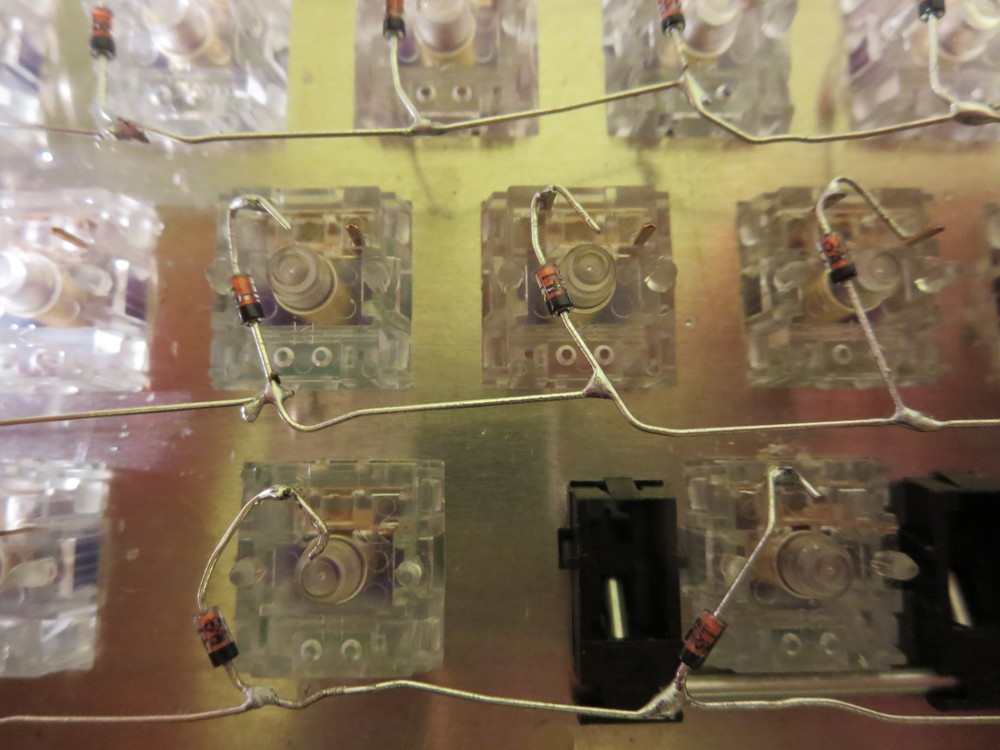
I got to work with soldering diodes to the switches. The diodes are needed to avoid “ghosting”, which would result in keys erroneously being reported as pressed, which is really not what we want. Here you can see my dodgy soldering and attempts to get the diodes bent into shape. This thing does actually work, trust me!
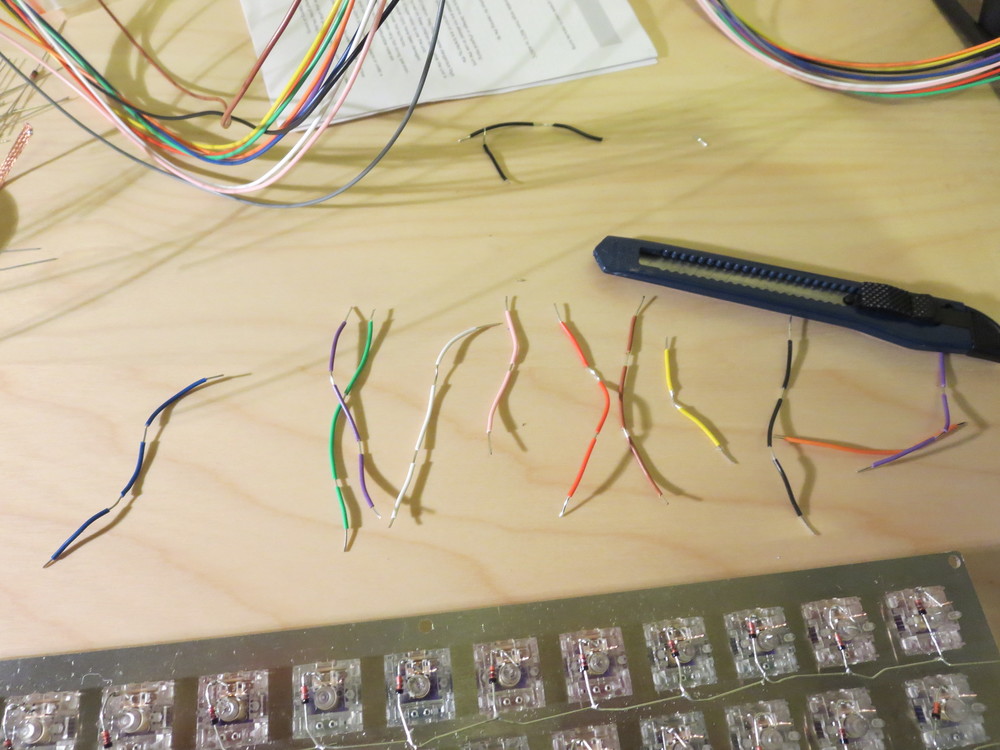
Here are the wires which I prepared for soldering. I just ordered a bunch of multicoloured AWG22 wire from EBay and it seems to do the job fine. I somehow misplaced my wire strippers, so did this armed with just a box cutter. Would not recommend.
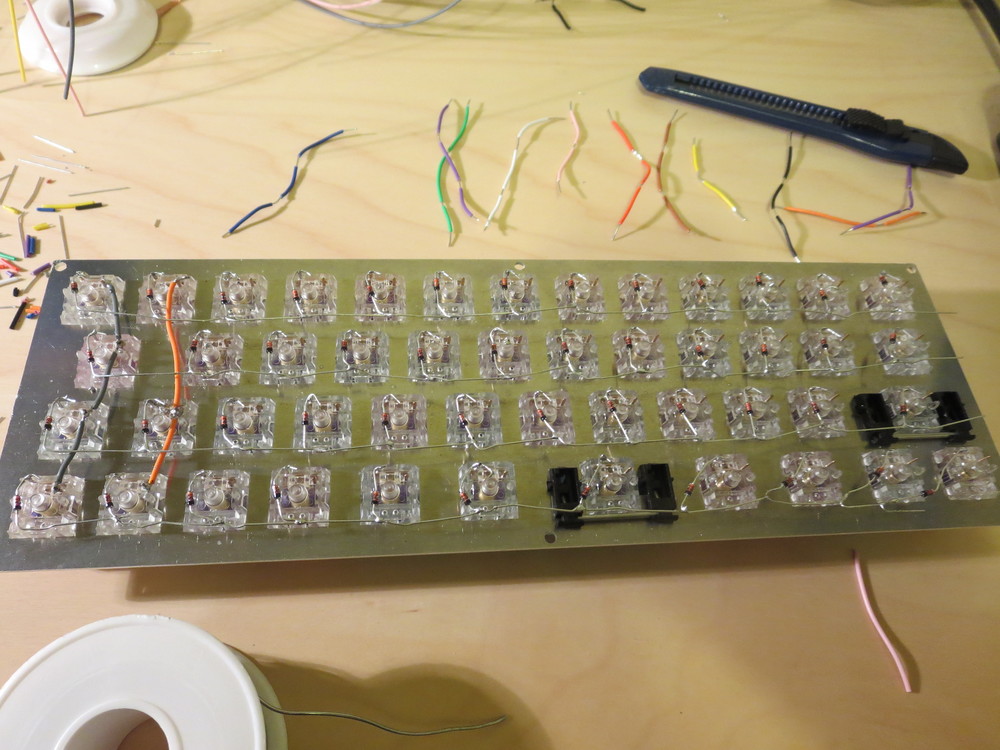
Here’s a shot of all the diodes in place and the column wiring started.
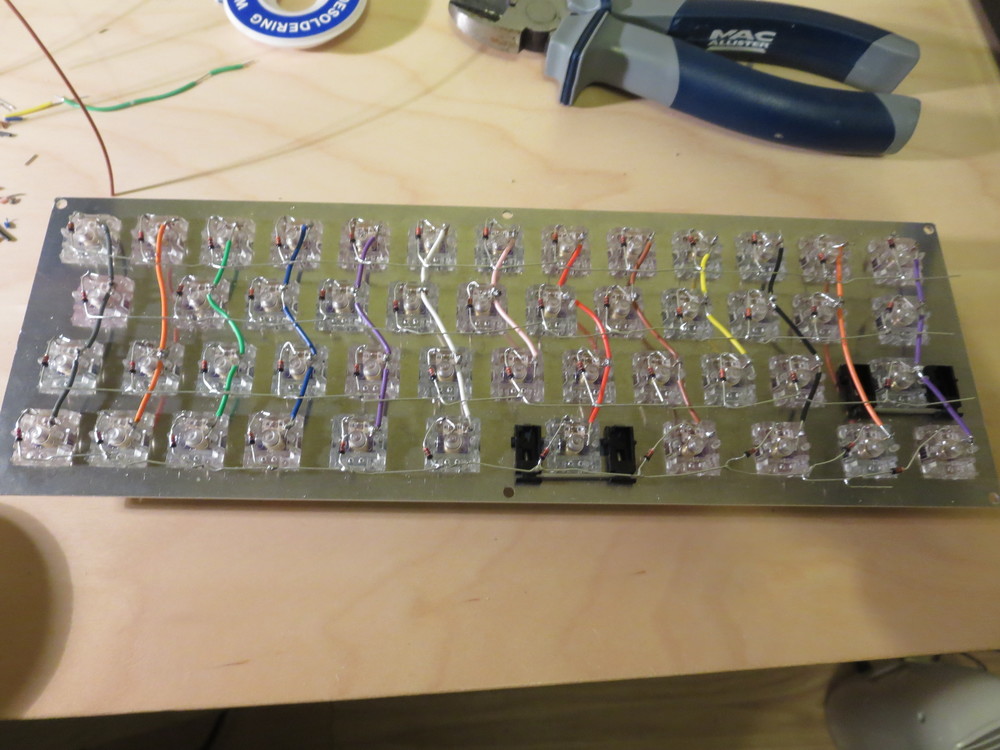
All the columns are now wired! I was pretty pleased with how neat everything looked.
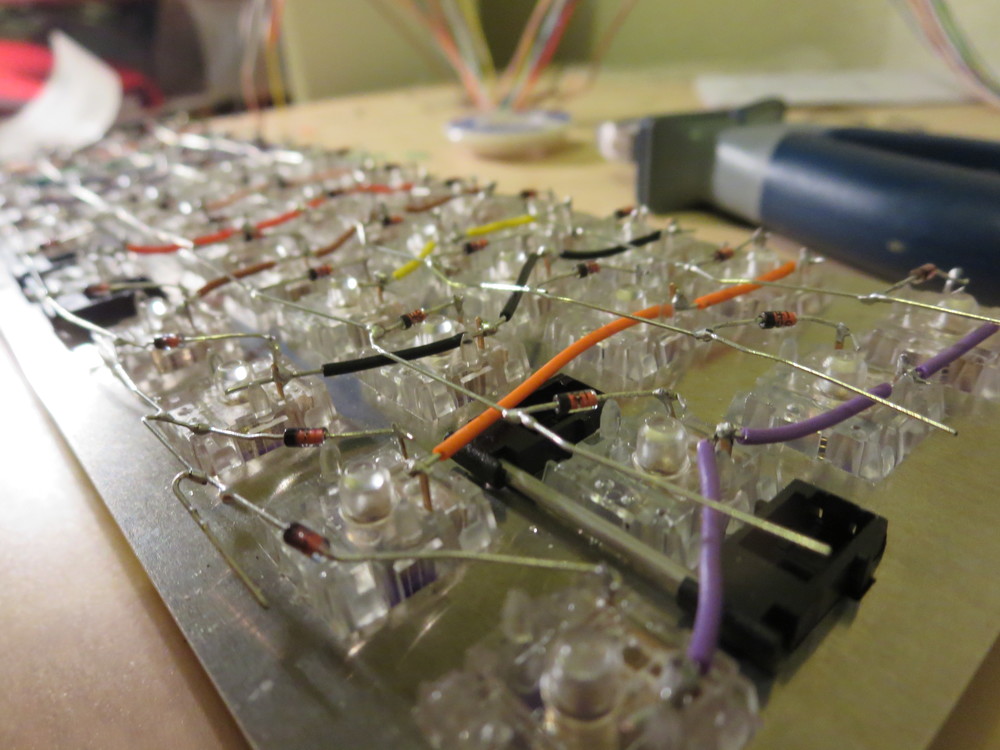
You can see at the bottom here where I had to get creative with getting the diodes to work without adding any extra wire in there. Don’t worry, I did snip the ends off of them in the end.

Here’s my first ever attempt at soldering a microcontroller. I know, I have some improving to do. I had to redo some of these joints after taking this picture, but everything worked in the end. The chip I used is called the Teensy 2, and it appears to be the de facto standard in small custom keyboards. Essentially you just wire every row and every column to a pin on the Teensy. The multiple colours help a lot in tracking down what you soldered to what when it comes to writing the firmware.
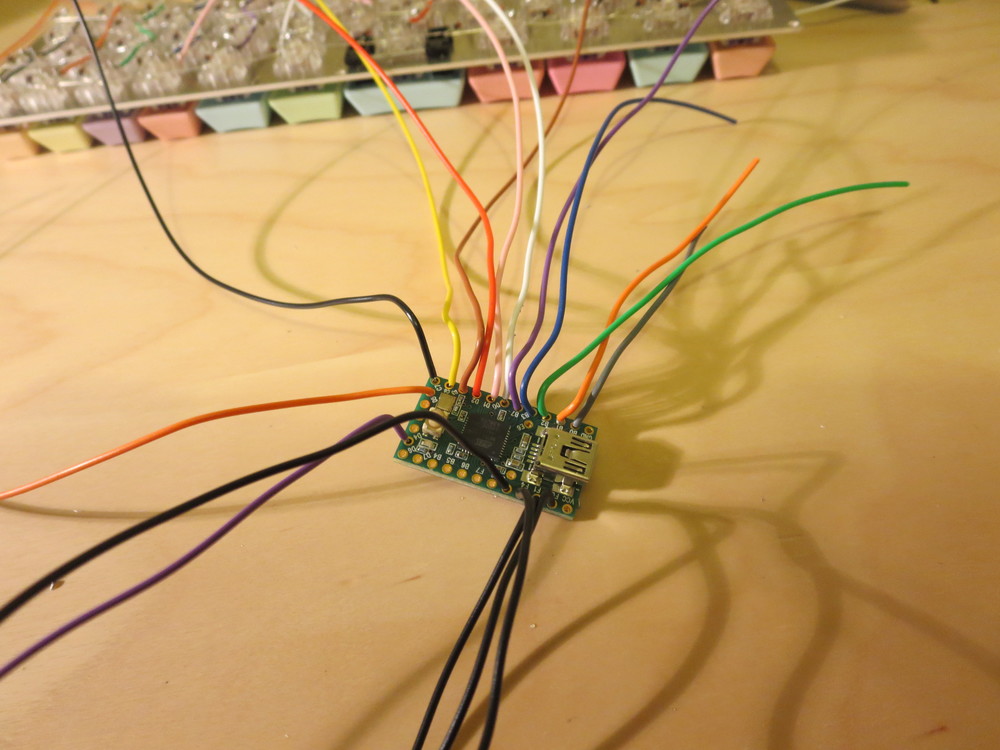
Mmmmmm, spidery.
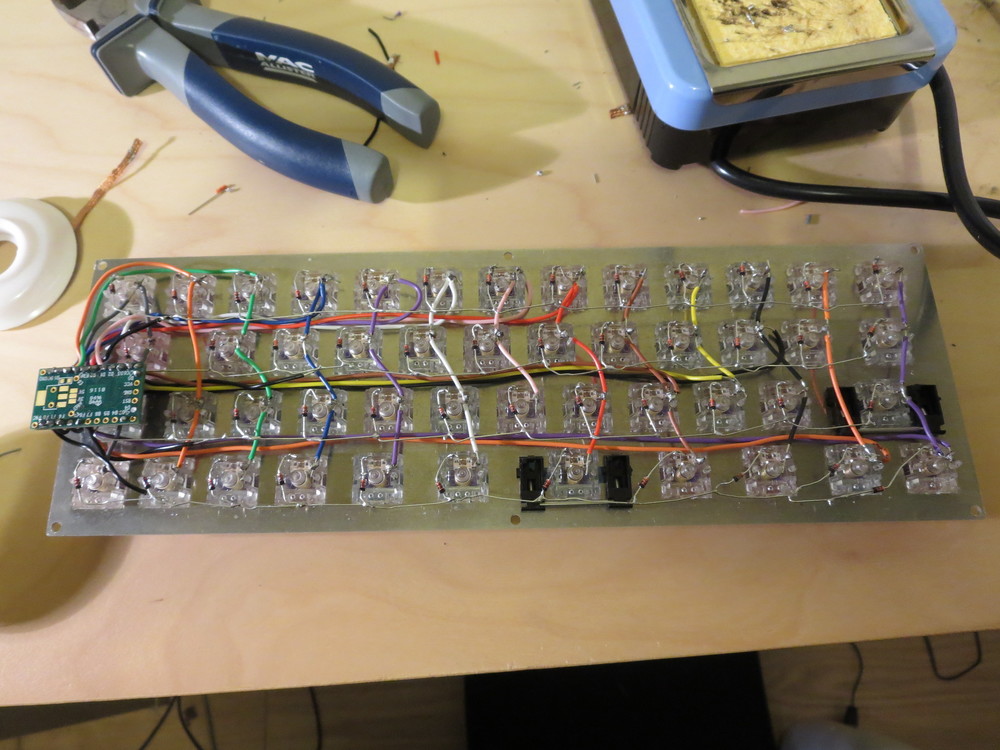
Here’s all the wiring after I got the microcontroller in place. It took a lot of work to get those wires running underneath all of the diodes, but I think it was worth the effort. Maybe in the future I’ll put them down beforehand to save the effort.
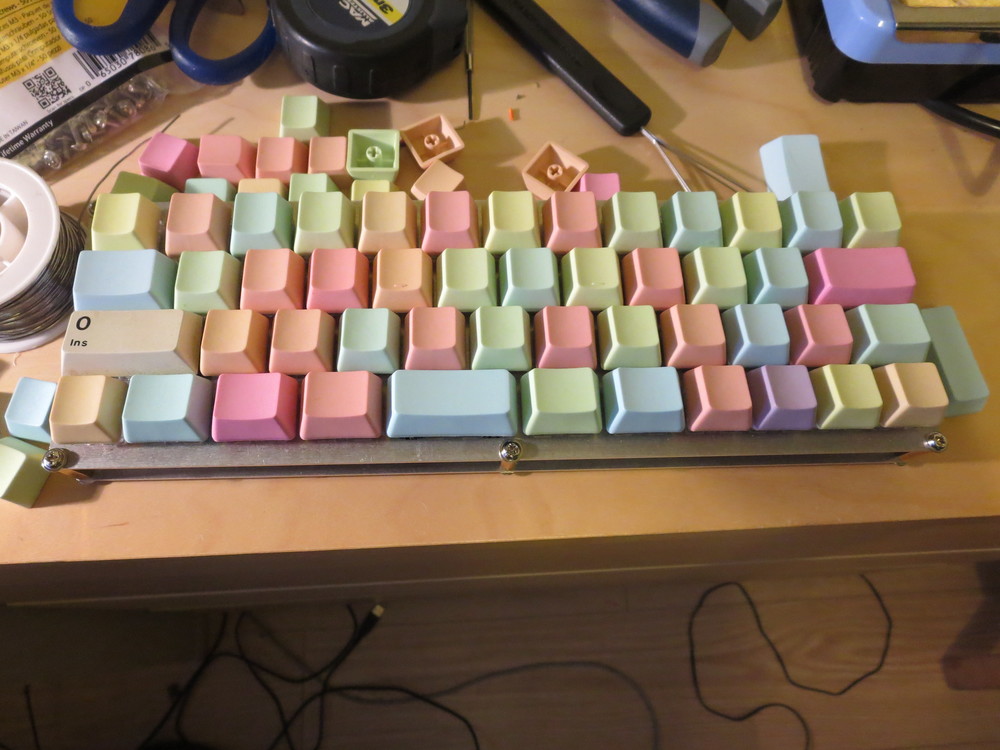
And here’s the finished product! You can see where I had to cannibalise a keycap to get one of the right profile for my odd layout, and the keys in the top- and bottom-left are the wrong size or profile, but I’m pretty happy with the result. I might rewire the controller on the inside of the case and glue a male-to-female extension cable in, but this works for now.
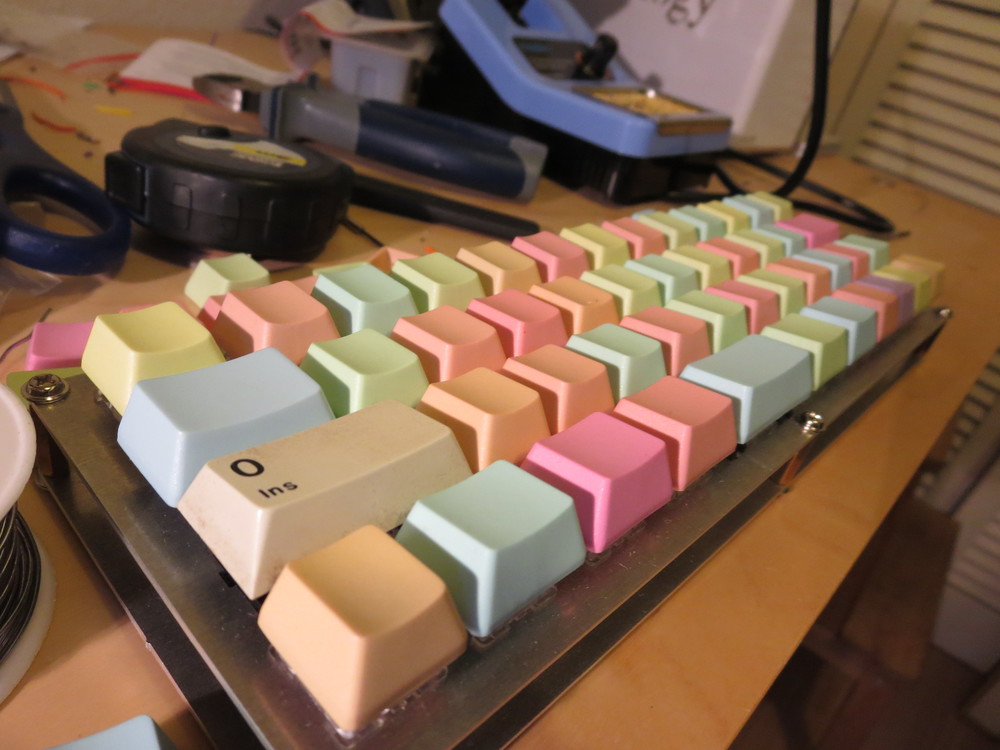
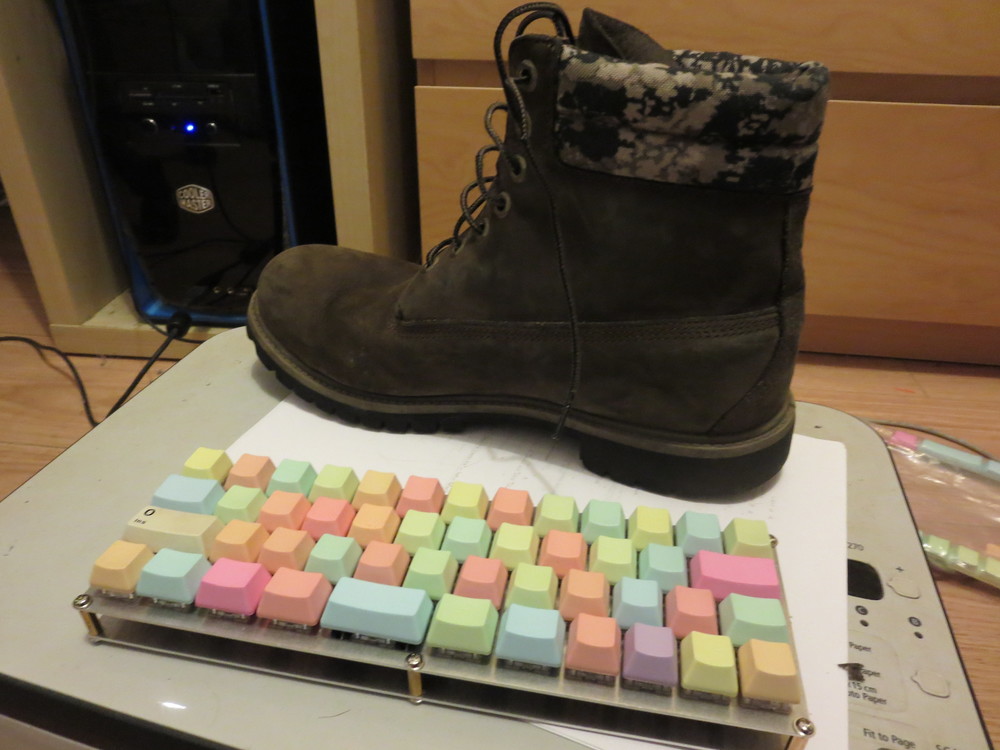
For keyboard science.
The last thing was to write the firmware so that I could actually type on the thing. I thought about writing it from scratch in C++17 or something, but eventually I got too excited to try it out that I just went for a pre-existing framework. My firmware is based on QMK, which is in turn based on TMK. QMK cleans up some of the duplication which causes a pain when using TMK and adds some extra functionality for small keyboards and Teensy controllers. You can see my code here, but I’ll dump the interesting parts here.
/* USB Device descriptor parameter */
#define VENDOR_ID       0xFEED
#define PRODUCT_ID      0x6060
#define DEVICE_VER      0x0001
#define MANUFACTURER    TartanLlama
#define PRODUCT         DeepThought
#define DESCRIPTION     A silly keyboard
This tells QMK what information to report when asked about the USB device.
/* key matrix size */
#define MATRIX_ROWS 4
#define MATRIX_COLS 13

/* COL2ROW or ROW2COL */
#define DIODE_DIRECTION COL2ROW

#define MATRIX_ROW_PINS { F4, F1, F6, F0}
#define MATRIX_COL_PINS { D7, D6, C7, C6, D3, D2, D1, D0, B7, B3, B2, B1, B0 }
#define UNUSED_PINS
This tells QMK which pins you soldered to which rows and columns of your matrix. Now that I look at it, I probably should have filled in the UNUSED_PINS section, but hey, it works, so I can’t be bothered.
#define KEYMAP( \
    K00, K01, K02, K03, K04, K05, K06, K07, K08, K09, K0A, K0B, K0C,  \
    K10, K11, K12, K13, K14, K15, K16, K17, K18, K19, K1A,      K1C,  \
    K20,      K22, K23, K24, K25, K26, K27, K28, K29, K2A, K2B, K2C,    \
    K30, K31, K32,      K34, K35,      K37, K38, K39, K3A, K3B,  K3C    \
) { \
    { KC_##K00, KC_##K01, KC_##K02, KC_##K03, KC_##K04, KC_##K05, KC_##K06, KC_##K07, KC_##K08, KC_##K09, KC_##K0A, KC_##K0B, KC_##K0C }, \
    { KC_##K10, KC_##K11, KC_##K12, KC_##K13, KC_##K14, KC_##K15, KC_##K16, KC_##K17, KC_##K18, KC_##K19, KC_##K1A, KC_NO, KC_##K1C }, \
    { KC_##K20, KC_NO   , KC_##K22, KC_##K23, KC_##K24, KC_##K25, KC_##K26, KC_##K27, KC_##K28, KC_##K29, KC_##K2A, KC_##K2B, KC_##K2C }, \
    { KC_##K30, KC_##K31, KC_##K32, KC_NO   , KC_##K34, KC_##K35, KC_NO   , KC_##K37, KC_##K38, KC_##K39, KC_##K3A, KC_##K3B, KC_##K3C } \
}
Icky icky icky. This is where I’d really like to use C++ templates to clear everything up. This total mess tells the framework how you’ve wired up your switches in columns and rows. Again, I’ll probably never have to change this code, so it’s not the end of the world.
#define KC_PND LALT(KC_4) //Pound sign

const uint16_t PROGMEM keymaps[][MATRIX_ROWS][MATRIX_COLS] = {
    KEYMAP(
        TAB, QUOT,COMM,DOT, P,   Y,   F,   G,   C,   R,   L,   BSPC,FN3, \
        LCTL,A,   O,   E,   U,   I,   D,   H,   T,   N,   S,   ENT, \
        LSFT,SCLN,Q,   J,   K,   X,   B,   M,   W,   V,   Z,   DEL, \
        CAPS,LGUI,ESC,LALT, SPC,      FN0, FN1, LEFT,DOWN,UP,  RGHT),

    KEYMAP(
        TAB, 1,   2,   3,   4,   5,   6,   7,   8,   9,   0,   TRNS,TRNS, \
        TRNS,LBRC,RBRC,SLSH,EQL, MINS,NUHS,BSLS,GRV ,TRNS,TRNS,TRNS,\
        TRNS,F1,  F2,  F3,  F4,  F5,  F6,  F7,  F8,  F9,  F10, DEL, \
        TRNS,TRNS,TRNS,TRNS,TRNS,     TRNS,TRNS,TRNS,TRNS,TRNS,TRNS),

    KEYMAP(
        TRNS,EXLM,AT,  PND, DLR, PERC,CIRC,AMPR,ASTR,LPRN,RPRN,TRNS,TRNS, \
        TRNS,LCBR,RCBR,QUES,PLUS,UNDS,TILD,PIPE,TRNS,TRNS,TRNS,TRNS, \
        TRNS,INS, HOME,PGUP,PGDN,END, PSCR, F11, F12,TRNS,TRNS,TRNS, \
        TRNS,TRNS,TRNS,TRNS,TRNS,     TRNS,TRNS,TRNS,TRNS,TRNS,TRNS),
};

const uint16_t PROGMEM fn_actions[] = {
    [0] = ACTION_LAYER_MOMENTARY(1),
    [1] = ACTION_LAYER_MOMENTARY(2),
};
This is the fun part where I get to key in my crazy layout. Programming the different layers is dead easy, I just add ACTION_LAYER_MOMENTARY actions to a magic array and the framework handles everything for me. There are a bunch of other possible actions to add there, like toggling a layer rather than holding it, doing different actions on taps and holds, and way more.
If I build another keyboard I’d love to make a Dactyl. Just look at the thing:
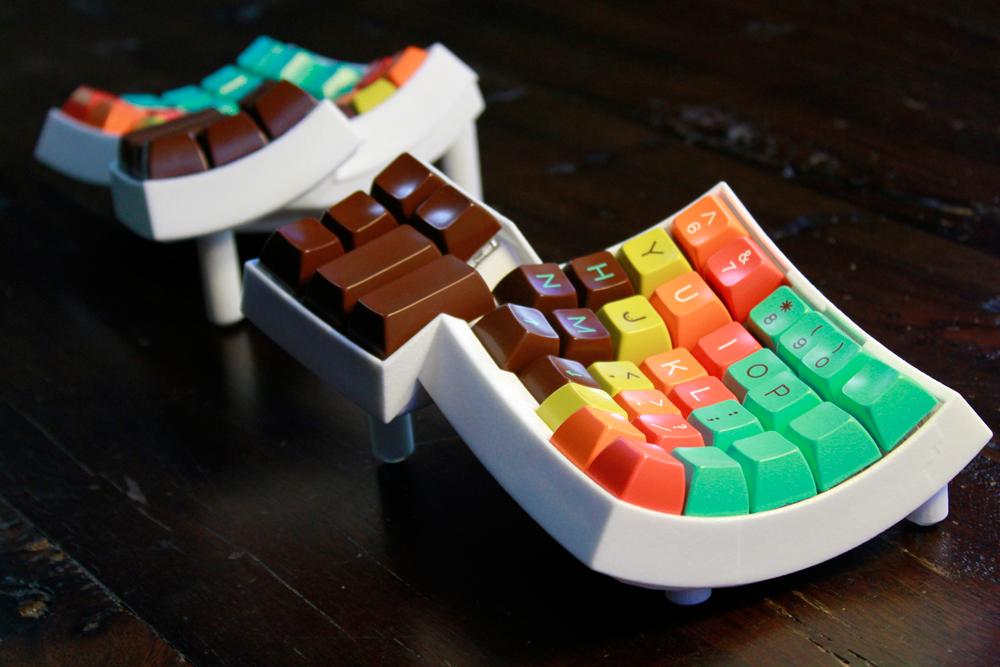
Unfortunately it’s pretty expensive to get a case 3D printed to a good quality, so it might take me a while to save for all the parts, but it’s something to aim for in the future.
That’s it! My keyboard isn’t perfect, but I can keep improving it, and in the meantime I have a working piece of hardware which I designed and built myself, which is pretty rewarding. Feel free to ask any questions or insult my soldering in the comments!
Let me know what you think of this article on twitter @TartanLlama or leave a comment below!